This tutorial explains how to download and install the NordVPN application to your Windows PC, Log in, and connect to our servers. You can also find an explanation of various settings.
Downloading and installing
1. Open the NordVPN downloads page here: https://nordvpn.com/download/
Click on Download Now next to the Windows Section.

2. Navigate to your Downloads folder and double-click the latest.exe installation file you have downloaded.

3. A new window might pop up (depending on your Windows settings) asking “Do you want to allow this app to make changes to your device?”. Click Yes.

4. If installing for the first time, the OpenVPN TAP adapter installation will appear. In the window, click Next, I Agree, Next, and Install.

5. Then the installer window will open. Click Install in the first screen.

6. The installer will proceed with the installation process.

7. Once installed, the NordVPN application will start, and appear in a new window. A shortcut to the application will also appear on your desktop.

Connecting
When connecting for the first time, Windows may ask if you wish to allow NordVPN to install a TAP driver. It is necessary for the NordVPN application to make a connection to the NordVPN servers – click Allow if such message appears.
Logging in
8. In the NordVPN window, enter your NordVPN credentials and click Login now.

9. The main screen of the application will appear. Here you can see the menu at the top left corner, a big, round Quick Connect button and status identifier in the top middle, a search button in the top right corner, and the map of countries you can connect to.

Quick Connect
10. Clicking the Quick Connect button at the top of the application will automatically connect you. Using a complex formula that includes various server parameters, Quick Connect chooses the best server for you at that moment.

11. Once connected, the country pin on the map will light up green, as well as the Quick Connect button sliding all the way to the right and the status label saying that you are connected. It will also tell you your new IP address.

Country selection
12. You can also connect by clicking the country pin on the map itself,

As well as clicking the List button in the left side, and clicking the country in the list that appears.

Connection wizard
13. If you stay in the Map view for a bit without connecting, the Connection wizard will appear.

14. The Connection wizard will give a recommendation for you, depending on your needs.

Search
15. You can also search for servers in the search menu found at the top right corner of the application. Simply search for a specific server or category.

Specific servers
16. In the Servers tab, you can find each specific server that we offer, neatly organized into categories and countries.

17. For example, we can expand the Double VPN category, and select the Netherlands – UK Double VPN server.
You can notice that each server has a percentage next to it, which indicates the current load of the server. The more people connecting to the server, the higher the percentage.
The distance to the server is also visible. That way you can quickly see if the server is further away from you.

18. To connect to the specific server, click the Connect now button in the sidebar.
Once connected, the sidebar will display the current amount of traffic transmitted.
You can also note that the top of the app also indicates that you are connected by sliding the Quick Connect button to the right side, and also displaying an appropriate status.

19. You can also add a server to your favourites by clicking the heart symbol next to it in the list, or, if the server is currently selected, in the sidebar.

20. Your favourite servers will appear in their own category, called My Favourite Servers. You can connect to them like any other server.

Settings
21. In the Settings tab you can configure the application to your liking.

- Automatic Updates – enable this to automatically offer to update the application on startup. Enabled by default.
- Auto connect – Enable this to automatically connect to a server when the application starts. Disabled by default.
- Start NordVPN on startup – Enable this to start NordVPN when you start your computer. Enabled by default.
- Kill Switch – Enable this to terminate any applications you specify in the case of an unintended disconnection. Disabled by default.
For example, you are using a public network, and use NordVPN to protect your confidential Skype conversation. You can add Skype to the Kill Switch list. In the case of an unexpected VPN connection cutoff, such as an unstable WiFi network, Windows will re-connect to WiFi, but the VPN connection will not be enabled yet. Kill Switch will close down Skype before it can transmit any of your sensitive info on the public network, thus ensuring your privacy.
- Notifications – Enable this to receive Windows notifications when you connect or disconnect from a server. Enabled by default.
- Show Tray icon – Enable this to display the NordVPN icon in the Windows system tray, which is where Windows displays applications that are running in the background. Enabled by default.
- System of measurement – You can change the distance indicator between metric and imperial here. Imperial by default.
- Advanced settings:
- Server List – Enable this to show the “Servers” tab in the menu. Enabled by default.
- Protocol – UDP is mainly used for online streaming and downloading. TCP is more reliable but a little slower than UDP and usually used for web browsing. UDP by default.
In the sidebar on the left you can also access your account details and the system log. The Logout button is also at the bottom.
Running in the background & closing the application
22. Once you close the application, it will still be running in the background. If Show Tray icon is enabled in the settings, you can see the application running in the system tray area, which can be found at the bottom right corner of your screen.

It might also be in the hidden system tray area, which can be opened with the upwards arrow.

23. You can click this system tray icon to bring the application to the foreground. You can also right-click the icon to either perform a Quick Connect, or terminate the application completely.


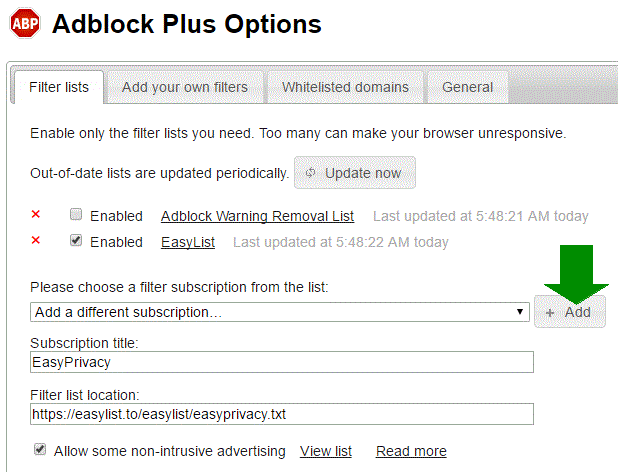
 A tab will open with the Adblocker settings and will give you the option to add the new filter subscription. Click the Add button as shown below.