10 Tips and Tricks Use Outlook Web App Efficiently and Effectively
Outlook.com is the free web based email service offered by Microsoft. It is sometimes refereed to as Outlook Lite. It was previously known as Hotmail. Microsoft likes to make thing more complicated than necessary, so they also makes paid versions and a desktop version with the same name. These can costs between $70 to $100 per year depending on the types of options you choose.
However, the free version has some great features that might just be enough for the average user. Read my top 10 tips and tricks below to see if Outlook Web App, also known as OWA, is right for you. Go here to grab yourself a free account : https://outlook.live.com/owa/
1. Use Folders
Just like you create folders on your computer, folders can be created in Outlook to organize emails you receive in your inbox. I receive periodic emails from new customers, subscribers, invoices, marketing events/trips reports, ect. For each of these, I create a separate folder and sort my email into these folders by dragging and dropping them. This allows me to quickly glance in these folders and help prioritize what I want to work on. For example, at the end of the month, I might look in the bills folder to find what I need to pay. Since customers are important, I will look in the customers folder once a day to make sure there are no pending issues or requests that need my immediate attention.
Creating Subfolders
Subfolders are folders inside folders. For example, in the folder Social Media I just created, I might want to create a folder for Facebook, and Twitter. All you have to do is, right click on the folder on the folder in which you need to make a subfolder, and then click Create Subfolder on the popup menu as shown below.

Once you have created the folders, when you receive an email, you can left click on that email and drag it into the pertaining folder. This way, if you need to quickly find an email , you know exactly which folder to look in. The below video demonstrates how to make a folder, and how to drag and drop an email from my inbox that belongs in that folder.
2. Add Rules to Folders
Wouldn’t it be great if, instead of manually dragging and dropping emails, they were automatically placed, or sorted, into designated folders. Well, that can be easily done by setting up a rule for a folder.
What Are Rules?
“Rules” is a built in function of Outlook. These rules are created by the user. For example, we can set a rule for messages from whatever@facebookmail.com to be placed automatically in the Facebook subfolder as soon as it arrives into our inbox. So, whenever you get an email that meets one of the rules you have set for your email, they are automatically dealt with.
Below video will demonstrate how to set a rule for email form djfreealtsoft@gmail to go directly in to the DJ@Freealtsoft folder. No more drag and drop!!!
What Else Can Rules Do?
-You can set a rule for email from certain individuals or companies to go straight to junk.
-You can set a rule for any email with a specific word or phrase in the subject line to get deleted or put in a specific folder. If you are throwing a birthday party for Sam, you might send an email invetation with the subject “Sam’s party.” You can set a rule for any email with the words “Sam’s party” to go straight to a folder lablesd “Sam.” That way, all email dealing with Sam’s party will be organized into one folder insted of all over in you inbox!
3. Conversation View
Conversation View is a way of seeing you email messages, or communications, in chronological order between two people or a group. Instead of a list of emails in you inbox, Conversation View groups related emails into one single message thread. It does this by looking at the subject line of you emails, and if messages have the same subject, then they get grouped into one message view. Sort of like a chat in you messaging app. If the subject is the same, Conversation View will group them together.
To enable Conversation View:
- At the top of the page, select Settings
 to open Quick settings.
 - Under Conversation view, choose one of the following:
- To sort messages by conversation, select Newest messages on top or Newest messages on bottom.
-
To show email as individual messages, select Off.
A good way to understand conversation view it to see it in action. In the below demonstration of Conversation View, we will see a email exchange between JD and DJ.
4. Import a List of Contacts From Excel Spreadsheet
Outlook.com allows you to import a list of contacts via a CSV, or comma separated values file. First thing to do is download the FreeAltSoft.com’s Excel template that has been formatted for this task. The tempalte contains some sample infomation as an example, delete dummy data and add your own data. Click here to download the file.
Open the template in Excel and add your contacts information, such as first and last name and email address under the appropriate headings.
Select File > Save As.
Use the drop-down box to select CSV (Comma delimited) (*.csv), give your file a name, and then select Save.

In Outlook.com, select  to go to the People page.
On the toolbar, select Manage > Import contacts.

Select Browse, choose the CSV file you created from the template, and then select Open.
Select Import.
5. Send One Email to a List of Contacts
Contact list is a feature in Outlook that lets you make different email list from your contacts. You can use a contact list to make a distribution emails. Say you want to send a monthly newsletter or a monthly update to some people in your contacts, but not all. Then you would make a distribution group. If you were taking a collage course and you wanted to make a study group to share homework answers and help each other out, then you would make a group to collaborate and share documents with. For example, create a contact list named English 101 and add all the your classmate emails to it. When you want to send an email message to everyone in the class, just add ENGLISH 101 in the To line of the email.
1. Click the People ![]() button to got to the people page.
button to got to the people page.
2. Click the arrow next to New contact and then select New contact list.

3. Give your contact list a name, and then add names or email addresses.
4. Click Create.
6. Create Groups

Send Email to Your Group


How to Share Files With Your Group
 Go to group files.
How to Use Groups Calendar
1. Select you group and click the calendar icon.

2. Click New event, fill in the details for your calendar event and click the Save button.

7. Flag a Message
Have you ever wanted to replay back to someone later at some point, only to go back to your inbox to find that message buried under new messages. In order to easily find the message that you need to follow up on you can add a follow-up flag. A flag is a visual indication in you message list that you want to return to that message later. In the message list, flagged items are shows by the  symbol.
How to Flag a Message
- In the message list, hover over the message to see the flag option.

- Select
 to flag the message.
 - Select
 to unflag the message.
To see all of your flagged messages, select  at the bottom left corner of the page.
8. Pin a Message
Now that you know how to flag a message to indicated you need to get back to that email at some point, how about finding those messages quickly. Here is where pinning messages can come in handy. Pinning a message moves it to the top of the inbox so that it is easy to find later. A pinned message is indicated by a  symbol
How to Pin a Message
-
In the message list, hover over the message to see the pin option.

- Select
 to keep the message at the top of your inbox.
 -
Select
 to unpin the message.
Also note that to pin a message or see pinned messages, your inbox must be sorted by date. Select Filter at the top of the message list to change how your inbox is sorted.
9. Add Some Add-ins
Add-ins are extra programs you can add to Outlook.com to help extend the capabilities of Outlook.com. For example, you get an email form your student club president to come up with ideas for a fund raiser. With an add-in, you can turn this email to a task right from your email, without opening another program to do so.
Outlook on the Desktop: This is program you download and install on your computer. Once setup, the application will pin you Outlook.com calendar to your desktop in plain sight. The app also has the ability to switch between any outlook view, including: calendar, inbox, contacts, tasks and notes views.
Text Lightning: This is like having an artificial intelligence wright your email for you. Text Lightning keeps track of your commonly written text by you and saves them as a list of snippets. You are given instant access to the text snippets you have used to reply to similar messages in the past, and then reuse it whenever you are asked again.
Evernote: Evernote is a popular program that allows you to organice notes online and access them with almost any devise and platform. This add-in to Outlook.com adds access to Evernote right into your email composer. You can save emails from Outlook to Evernote and organize them, or quickly add notes from Evernote to your Outlook email and share them with others.
Skype: Make video and voice calls without having to leave your inbox.
There are a lot more Add-ins and you can search them by following the directions below.
How To Install Add-ins
1. Click on an email message and click the drop down menu in Outlook.com, and then select Get Add-ins.

2. On the Add-ins for Outlook page, search and click Add on the add-in.

10. Make a Template
You charge a monthly fee for a service you proved, and every month you have to send an email out reminding you customers the invoice is due . So, at the end of every month, you send an email something along the lines of “Dear Customer, This is a friendly reminder that payment for services is due in 5 day. Thank you in advance for your prompt payment.” You can do this every month, but there is an easier way. In Outlook , you can create a pre-set template saying that exact thing, click one button, and then you’ve sent a your message to your customers.
So, those of you who repeatedly send the same message, you may want to create a new template. You can create a template containing any information which will remain constant, save the template, and then use the template to send a new message. Use email templates to send messages that include information that infrequently changes from message to message. Compose and save a message as a template, and then reuse it when you want it. New information can be added before the template is sent as an email message
Creating a Template
1. Click the New Message button to create a new message.
2. In the lower right corner in the New Message window, click on the ‘My Templates’ icon.

3. Click on the + Template and type a Template Name and the body of the template (e.g., all the standard information).


4. Click Save.
5. Click on the Template you created and it will appear in the body of the new message.

Bonus. Learn Some Shortcuts
Ctrl + Enter. Shortcut to send an email when in an active one
Ctrl + Delete. Shortcut to deleting either an open email or one that’s highlighted in your inbox.
Ctrl + R. Replies to an email
Ctrl + Alt + R. Replies to all.
Ctrl + F. Fwd an email.
Alt + S to send active mail
I think its Space + Ctrl to make the format all the same if you do a lot of copying and pasting, just have to highlight that part that needs formatting.


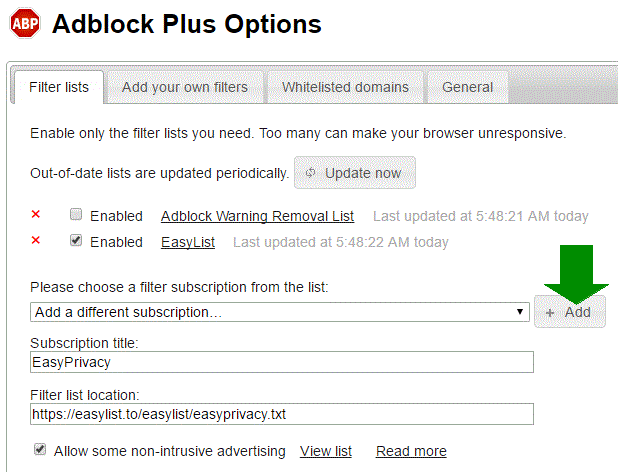
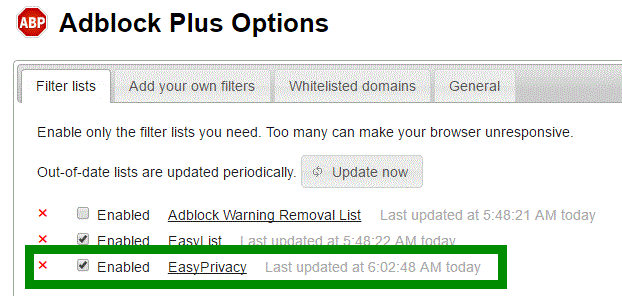
 A tab will open with the Adblocker settings and will give you the option to add the new filter subscription. Click the Add button as shown below.


