FreeAltSoft
  • Home
  • New Articles
  • Article Series
  • Find Software
    • Paid List
    • FREE List
    • Database
  • About
  • Contact
  • Search

Articles

Make Use Of Toolbars In Windows

Make Use of Toolbars in Windows

  • March 16, 2020
  • DJ from FreeAltSoft
  • Optimize Productivity
  • 0 Comments

The Windows taskbar is a strip at the bottom of the screen that holds the Windows Start button to the left and the time and date to the right.  It…

Continue Reading→
Color Code Windows 10 Folders

Color Code Windows 10 Folders

  • March 10, 2020
  • DJ from FreeAltSoft
  • Optimize Productivity
  • 0 Comments

Windows operation system uses folders to organize files in your computer.   You might have several folders in My Documents as shown below, and there might be more folders in these…

Continue Reading→
Optimize Productivity – Intro

Optimize Productivity – Intro

  • November 12, 2019
  • DJ from FreeAltSoft
  • Optimize Productivity
  • 0 Comments

Maximize Your Productivity  So you wake up one day and you are the owner of a bakery in New York.  A father (because a mom would never forget something like…

Continue Reading→
Review On JotterPad, A Free Writing Software For Android Devices

Review on JotterPad, a Free Writing Software for Android Devices

  • August 26, 2017
  • Trina
  • Review
  • 0 Comments

Hi! I’m Trina from FreeAltSoft. In the recent post entitled “Awesome Free Software to Write your First Book,” we looked at several softwares you can use to begin your writing…

Continue Reading→
Awesome Free Software To Write Your First Book

Awesome Free Software To Write Your First Book

  • August 26, 2017
  • DJ from FreeAltSoft
  • Review
  • 0 Comments

This is for all you first time novelist and writers or those that are considering jumping into writing but have no idea where to begin.  So you have a great…

Continue Reading→
Do This To Get Back Space From Your Computer

Do This To Get Back Space From Your Computer

  • June 16, 2017
  • DJ from FreeAltSoft
  • Informative
  • 0 Comments

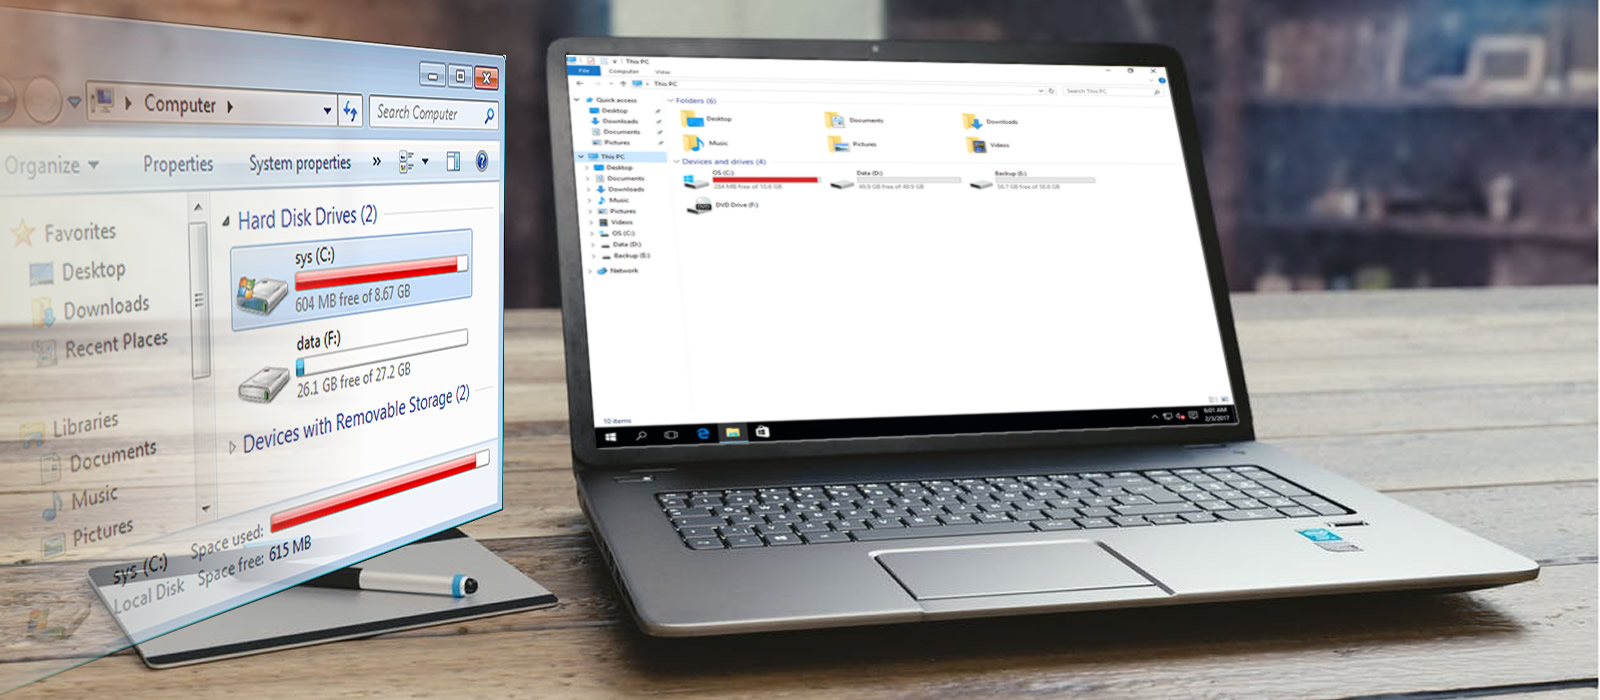
Remember how excited you were when you got your brand spanking new computer?  It had a great processor, a bunch of USB ports, a CD/DVD burner, memory to run multiple…

Continue Reading→
Top 10 Trends That Will Protect Your Privacy While Browsing The Internet

Top 10 Trends That Will Protect Your Privacy While Browsing The Internet

  • April 7, 2017
  • DJ from FreeAltSoft
  • Advice
  • 0 Comments

Recently, I have been asked about internet privacy, mainly because it has dominated local and national news. You might have seen on TV or heard some of the headlines below…

Continue Reading→

BREAKING NEWS: Microsoft Giving Away Office and Windows 10

  • April 1, 2017
  • DJ from FreeAltSoft
  • Fun
  • 0 Comments

Guys, this is wonderful news for all you free open-source fanatics: several software sites are confirming that Microsoft CEO Satya Nadella has decided to make several of Microsoft retail products…

Continue Reading→
Subscriber Question: Free Video File Converter

Subscriber Question: Free Video File Converter

  • March 23, 2017
  • DJ from FreeAltSoft
  • SubscriberQA
  • 0 Comments

We recently received and email from Allan: FreeAltSoft, I am trying to insert a video into a PowerPoint 2016 slide.  I downloaded the video from YouTube in a mp4 format.…

Continue Reading→
Best Free Antivirus For 2017

Best Free Antivirus for 2017

  • March 23, 2017
  • DJ from FreeAltSoft
  • 2017EditorsChoice
  • 0 Comments

I would consider antivirus protection for your computer system as essential software.  There are viruses and malware threats all over the internet, and trojans and ransomware are becoming more common…

Continue Reading→
  • 1
  • 2
  • 3
Software categories
Recent Posts
  • DVD Ripping – Extracting DVD Video To Hard Drive
    DVD Ripping – Extracting DVD Video to Hard Drive
    March 22, 2021
  • Flash Player Is Getting Axed
    Flash Player is Getting Axed
    May 9, 2020
  • How To Run Android On Your PC With Emulators
    How to Run Android on Your PC With Emulators
    April 27, 2020
  • All About Fake Email Accounts And Why You Need One
    All About Fake Email Accounts and Why You Need One
    April 18, 2020
Series
  • All About Apache OpenOffice (2)
  • Asides Series (3)
  • Best Practices (3)
  • Optimize Productivity (3)

NEWSLETTER

Don't miss finding out about free software that can save you thousands of dollars. Subscribe to our newsletter and be the first to find out about some pretty cool stuff.
Facebook
Archives
  • March 2021
  • May 2020
  • April 2020
  • March 2020
  • November 2019
  • August 2017
  • June 2017
  • April 2017
  • March 2017
  • February 2017
About Us

Technology is supposed to make our lives easier, but sometimes it can overwhelm and discourage people from utilizing its benefits. We hope people of all walks of life will be able to understand and use the information from this website to improve various aspects of their lives. Make sure you subscribe and learn with us!

Business Info

FreeAltSoft.com
12304 Dalewood Ct
Germantown, MD 20874

1 (240) 801-5083
djfrealtsoft@gmail.com
Links
  • Home
  • New Articles
  • Article Series
  • Find Software
    • Paid List
    • FREE List
    • Database
  • About
  • Contact

NEWSLETTER

Copyright Bizsine LLC - All Rights Reserved

PCPartPicker part list / Price breakdown by merchant

Type Item Price
CPU AMD – Ryzen 5 2600 3.4 GHz 6-Core Processor $145.00 @ Amazon
Motherboard *ASRock – B450 Pro4 ATX AM4 Motherboard $59.99 @ Newegg
Memory *Patriot – Viper 4 8 GB (2 x 4 GB) DDR4-3000 Memory $69.89 @ OutletPC
Storage *Team – L5 LITE 480 GB 2.5″ Solid State Drive $52.89 @ OutletPC
Video Card *Gigabyte – Radeon RX 570 4 GB Gaming 4G Video Card $129.99 @ Newegg
Case *Corsair – SPEC-01 RED ATX Mid Tower Case $24.99 @ Newegg
Power Supply *Corsair – CXM 550 W 80+ Bronze Certified Semi-Modular ATX Power Supply $29.99 @ Newegg
Operating System Microsoft – Windows 10 Home OEM 64-bit $98.89 @ OutletPC
Prices include shipping, taxes, rebates, and discounts
Total (before mail-in rebates) $696.63
Mail-in rebates -$85.00
Total $611.63
*Lowest price parts chosen from parametric criteria
Generated by PCPartPicker 2018-11-22 19:09 EST-0500
Setup OpenDNS on a D-Link Router

Configuration for D-Link DIR-615

Avatar
Patrick Colford

Updated 5 months ago

Follow

1. Visit the router’s IP address (http://192.168.0.1) in a new browser window.

If you are attempting to configure a D-Link router, take note of your computer’s Default Gateway IP address. The Default Gateway is the IP address of the D-Link router. By default, it should be 192.168.0.1. Most D-Link devices use the 192.168.0.X range. [D-Link Support]

Need help finding your Default Gateway address?

2. Enter the router password.

Note: if you have not changed the original settings, the default username is admin and the password is blank (nothing).

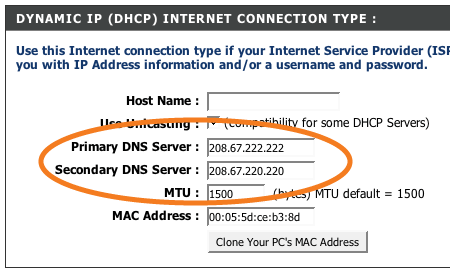
3. Click on the Manual Internet Connection Setup button at the bottom.

4. Enter the OpenDNS addresses in Primary DNS Server and Secondary DNS Server fields.

Please write down your current DNS settings before switching to OpenDNS, in case you want to return to your old settings for any reason.

The addresses for OpenDNS are:

  • 208.67.222.222
  • 208.67.220.220

Note: To enable these configurable DNS fields, you may need to disable the ‘Enable Advanced DNS’ feature, found in the same configuration page.

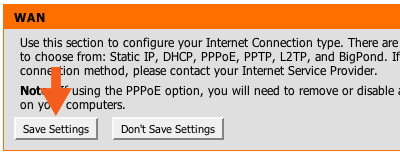
5. Click Save Settings button at the top.

After clicking the Save Settings button, we highly suggest that you flush your DNS resolver cache and web browser caches to ensure that your new DNS configuration settings take immediate effect. 

How To Setup Google Public DNS

Configure your network settings to use Google Public DNS

When you use Google Public DNS, you are changing your DNS “switchboard” operator from your ISP to Google Public DNS.

In most cases, the IP addresses used by your ISP’s domain name servers are automatically set by your ISP via the Dynamic Host Configuration Protocol (DHCP). To use Google Public DNS, you need to explicitly change the DNS settings in your operating system or device to use the Google Public DNS IP addresses. The procedure for changing your DNS settings varies according to operating system and version (Windows, Mac or Linux) or the device (computer, phone, or router). We give general procedures here that might not apply for your OS or device; please consult your vendor documentation for authoritative information.

Caution: We recommend that only users who are proficient with configuring operating system settings make these changes.

Important: Before you start

Before you change your DNS settings to use Google Public DNS, be sure to write down the current server addresses or settings on a piece of paper. It is very important that you keep these numbers for backup purposes, in case you need to revert to them at any time.

We also recommend that you print this page, in the event that you encounter a problem and need to refer to these instructions.

Google Public DNS IP addresses

The Google Public DNS IP addresses (IPv4) are as follows:

  • 8.8.8.8
  • 8.8.4.4

The Google Public DNS IPv6 addresses are as follows:

  • 2001:4860:4860::8888
  • 2001:4860:4860::8844

You can use either address as your primary or secondary DNS server. You can specify both addresses, but do not specify the same address as both primary and secondary.

You can configure Google Public DNS addresses for either IPv4 or IPv6 connections, or both. For IPv6-only networks with a NAT64 gateway using the 64:ff9b::/96 prefix, you can use Google Public DNS64 instead of Google Public DNS IPv6 addresses, providing connectivity to IPv4-only services without any other configuration.

Some devices use separate fields for all eight parts of IPv6 addresses and cannot accept the :: IPv6 abbreviation syntax. For such fields enter:

  • 2001:4860:4860:0:0:0:0:8888
  • 2001:4860:4860:0:0:0:0:8844

Expand the 0 entries to 0000 if four hex digits are required.

Change your DNS servers settings

Because the instructions differ between different versions/releases of each operating system, we only give one version as an example. If you need specific instructions for your operating system/version, please consult your vendor’s documentation. You may also find answers on our user group.

Many systems allow you to specify multiple DNS servers, to be contacted in a priority order. In the following instructions, we provide steps to specify only the Google Public DNS servers as the primary and secondary servers, to ensure that your setup will correctly use Google Public DNS in all cases.

Note: Depending on your network setup, you may need administrator/root privileges to change these settings.

Windows

DNS settings are specified in the TCP/IP Properties window for the selected network connection.

Example: Changing DNS server settings on Windows 7

  1. Go to the Control Panel.
  2. Click Network and Internet > Network and Sharing Center > Change adapter settings.
  3. Select the connection for which you want to configure Google Public DNS. For example:
    • To change the settings for an Ethernet connection, right-click Local Area Connection > Properties.
    • To change the settings for a wireless connection, right-click Wireless Network Connection > Properties.

    If you are prompted for an administrator password or confirmation, type the password or provide confirmation.

  4. Select the Networking tab. Under This connection uses the following items, select Internet Protocol Version 4 (TCP/IPv4) or Internet Protocol Version 6 (TCP/IPv6) and then click Properties.
  5. Click Advanced and select the DNS tab. If there are any DNS server IP addresses listed there, write them down for future reference, and remove them from this window.
  6. Click OK.
  7. Select Use the following DNS server addresses. If there are any IP addresses listed in the Preferred DNS server orAlternate DNS server, write them down for future reference.
  8. Replace those addresses with the IP addresses of the Google DNS servers:
    • For IPv4: 8.8.8.8 and/or 8.8.4.4.
    • For IPv6: 2001:4860:4860::8888 and/or 2001:4860:4860::8844.
    • For IPv6-only: you can use Google Public DNS64 instead of the IPv6 addresses in the previous point.
  9. Restart the connection you selected in step 3.
  10. Test that your setup is working correctly; see Test your new settings below.
  11. Repeat the procedure for additional network connections you want to change.

Mac OS

DNS settings are specified in the Network window.

Example: Changing DNS server settings on Mac OS 10.5

  1. Click Apple > System Preferences > Network.
  2. If the lock icon in the lower left-hand corner of the window is locked, click the icon to make changes, and when prompted to authenticate, enter your password.
  3. Select the connection for which you want to configure Google Public DNS. For example:
    • To change the settings for an Ethernet connection, select Built-In Ethernet, and click Advanced.
    • To change the settings for a wireless connection, select Airport, and click Advanced.
  4. Select the DNS tab.
  5. Click + to replace any listed addresses with, or add, the Google IP addresses at the top of the list:
    • For IPv4: 8.8.8.8 and/or 8.8.4.4.
    • For IPv6: 2001:4860:4860::8888 and/or 2001:4860:4860::8844.
    • For IPv6-only: you can use Google Public DNS64 instead of the IPv6 addresses in the previous point.
  6. Click Apply > OK.
  7. Test that your setup is working correctly; see Test your new settings below.
  8. Repeat the procedure for additional network connections you want to change.

Linux

In most modern Linux distributions, DNS settings are configured through Network Manager.

Example: Changing DNS server settings on Ubuntu

  1. Click System > Preferences > Network Connections.
  2. Select the connection for which you want to configure Google Public DNS. For example:
    • To change the settings for an Ethernet connection, select the Wired tab, then select your network interface in the list. It is usually called eth0.
    • To change the settings for a wireless connection, select the Wireless tab, then select the appropriate wireless network.
  3. Click Edit, and in the window that appears, select the IPv4 Settings or IPv6 Settings tab.
  4. If the selected method is Automatic (DHCP), open the dropdown and select Automatic (DHCP) addresses onlyinstead. If the method is set to something else, do not change it.
  5. In the DNS servers field, enter the Google Public DNS IP addresses, separated by a comma:
    • For IPv4: 8.8.8.8 and/or 8.8.4.4.
    • For IPv6: 2001:4860:4860::8888 and/or 2001:4860:4860::8844.
    • For IPv6-only: you can use Google Public DNS64 instead of the IPv6 addresses in the previous point.
  6. Click Apply to save the change. If you are prompted for a password or confirmation, type the password or provide confirmation.
  7. Test that your setup is working correctly; see Test your new settings below.
  8. Repeat the procedure for additional network connections you want to change.

If your distribution doesn’t use Network Manager, your DNS settings are specified in /etc/resolv.conf.

Example: Changing DNS server settings on a Debian server

  1. Edit /etc/resolv.conf:
    sudo vi /etc/resolv.conf
    
  2. If any nameserver lines appear, write down the IP addresses for future reference.
  3. Replace the nameserver lines with, or add, the following lines:

    For IPv4:

    nameserver 8.8.8.8
    nameserver 8.8.4.4
    

    For IPv6:

    nameserver 2001:4860:4860::8888
    nameserver 2001:4860:4860::8844
    

    For IPv6-only, you can use Google Public DNS64 instead of the above IPv6 addresses.

  4. Save and exit.
  5. Restart any Internet clients you are using.
  6. Test that your setup is working correctly; see Test your new settings below.

Additionally, if you are using DHCP client software that overwrites the settings in /etc/resolv.conf, you will need to set up the client accordingly by editing the client’s configuration file.

Example: Configuring DHCP client sofware on a Debian server

  1. Back up /etc/resolv.conf:
    sudo cp /etc/resolv.conf /etc/resolv.conf.auto
    
  2. Edit /etc/dhcp3/dhclient.conf:
    sudo vi /etc/dhcp3/dhclient.conf
    
  3. If there is a line containing domain-name-servers, write down the IP addresses for future reference.
  4. Replace that line with, or add, the following line:

    For IPv4:

    prepend domain-name-servers 8.8.8.8, 8.8.4.4;
    

    For IPv6:

    prepend domain-name-servers 2001:4860:4860::8888, 2001:4860:4860::8844;
    

    For IPv6-only, you can use Google Public DNS64 instead of the above IPv6 addresses.

  5. Save and exit.
  6. Restart any Internet clients you are using.
  7. Test that your setup is working correctly; see Test your new settings below.

Routers

Every router uses a different user interface for configuring DNS server settings; we provide only a generic procedure below. For more information, please consult your router documentation.

Note: Some ISPs hard-code their DNS servers into the equipment they provide; if you are using such a device, you will not be able to configure it to use Google Public DNS. Instead, you can configure each of the computers connected to the router, as described above.

To change your settings on a router:

  1. In your browser, enter the IP address to access the router’s administration console.
  2. When prompted, enter the password to access network settings.
  3. Find the screen in which DNS server settings are specified.
  4. If there are IP addresses specified in the fields for the primary and seconday DNS servers, write them down for future reference.
  5. Replace those addresses with the Google IP addresses:
    • For IPv4: 8.8.8.8 and/or 8.8.4.4.
    • For IPv6: 2001:4860:4860::8888 and/or 2001:4860:4860::8844.
    • For IPv6-only: you can use Google Public DNS64 instead of the IPv6 addresses in the previous point.
  6. Save and exit.
  7. Restart your browser.
  8. Test that your setup is working correctly; see Test your new settings below.

Some routers use separate fields for all eight parts of IPv6 addresses and cannot accept the :: IPv6 abbreviation syntax. For such fields enter:

  • 2001:4860:4860:0:0:0:0:8888
  • 2001:4860:4860:0:0:0:0:8844

Expand the 0 entries to 0000 if four hex digits are required.

Mobile or other devices

DNS servers are typically specified under advanced Wi-Fi settings. However, as every mobile device uses a different user interface for configuring DNS server settings, we provide only a generic procedure below. For more information, please consult your mobile provider’s documentation.

To change your settings on a mobile device:

  1. Go to the screen in which Wi-Fi settings are specified.
  2. Find the screen in which DNS server settings are specified.
  3. If there are IP addresses specified in the fields for the primary and seconday DNS servers, write them down for future reference.
  4. Replace those addresses with the Google IP addresses:
    • For IPv4: 8.8.8.8 and/or 8.8.4.4.
    • For IPv6: 2001:4860:4860::8888 and/or 2001:4860:4860::8844.
    • For IPv6-only: you can use Google Public DNS64 instead of the IPv6 addresses in the previous point.
  5. Save and exit.
  6. Test that your setup is working correctly; see Test your new settings below.

Test your new settings

To test that the Google DNS resolver is working:

  1. From your browser, enter a hostname URL (such as http://www.google.com/). If it resolves correctly, bookmark the page, and try accessing the page from the bookmark.
    • If you are using Google Public DNS64 on an IPv6-only system, repeat the above test with an IPv4-only hostname URL (such as http://ipv4.google.com/).

    If all of these tests work, everything is working correctly. If not, go to step 2.

  2. From your browser, type in a fixed IP address. You can use http://216.218.228.119/ (which points to the test-ipv6.com website) as the URL.1
    • If you are using Google Public DNS64 on an IPv6-only system, use http://[64:ff9b::d8da:e477]/ as the URL instead. If this test does not work, you do not have access to a NAT64 gateway at the reserved prefix 64:ff9b::/96 and cannot use Google Public DNS64.
    • If you are using an IPv6-only system without Google Public DNS64, use http://[2001:470:1:18::119]/ as the URL instead.

    If this works correctly, bookmark the page, and try accessing the page from the bookmark. If these tests work (but step 1 fails), then there is a problem with your DNS configuration; check the steps above to make sure you have configured everything correctly. If these tests do not work, go to step 3.

  3. Roll back the DNS changes you made and run the tests again. If the tests still do not work, then there is a problem with your network settings; contact your ISP or network administrator for assistance.

If you encounter any problems after setting Google Public DNS as your resolver, please run the diagnostic procedure.

1 Google thanks Jason Fesler for granting permission to use test-ipv6.com URLs for browser DNS testing purposes.

Switch back to your old DNS settings

If you had not previously configured any customized DNS servers, to switch back to your old settings, in the window in which you specified the Google IP addresses, select the option to enable obtaining DNS server addresses automatically, and/or delete the Google IP addresses. This will revert your settings to using your ISP’s default servers.

If you need to manually specify any addresses, use the procedures above to specify the old IP addresses.

If necessary, restart your system.

Shepard Smith Online Privacy.

Shepard Smith of Fox News discusses the online privacy law that is being repealed and how to protect your online privacy.

How To Setup NordVPN

This tutorial explains how to download and install the NordVPN application to your Windows PC, Log in, and connect to our servers. You can also find an explanation of various settings.

Downloading and installing

1. Open the NordVPN downloads page here: https://nordvpn.com/download/

Click on Download Now next to the Windows Section.

NordVPN Windows app 01


2. Navigate to your Downloads folder and double-click the latest.exe installation file you have downloaded.

NordVPN Windows app 02


3. A new window might pop up (depending on your Windows settings) asking “Do you want to allow this app to make changes to your device?”. Click Yes.

NordVPN Windows app 03


4. If installing for the first time, the OpenVPN TAP adapter installation will appear. In the window, click Next, I Agree, Next, and Install.

3d

5. Then the installer window will open. Click Install in the first screen.

nordvpn_windows_app_04


6. The installer will proceed with the installation process.

nordvpn_windows_app_05


7. Once installed, the NordVPN application will start, and appear in a new window. A shortcut to the application will also appear on your desktop.

NordVPN Windows app 06


Connecting

When connecting for the first time, Windows may ask if you wish to allow NordVPN to install a TAP driver. It is necessary for the NordVPN application to make a connection to the NordVPN servers – click Allow if such message appears.

Logging in

8. In the NordVPN window, enter your NordVPN credentials and click Login now.

NordVPN Windows app 07


9. The main screen of the application will appear. Here you can see the menu at the top left corner, a big, round Quick Connect button and status identifier in the top middle, a search button in the top right corner, and the map of countries you can connect to.

NordVPN Windows app 08


Quick Connect

10. Clicking the Quick Connect button at the top of the application will automatically connect you. Using a complex formula that includes various server parameters, Quick Connect chooses the best server for you at that moment.

NordVPN Windows app 09


11. Once connected, the country pin on the map will light up green, as well as the Quick Connect button sliding all the way to the right and the status label saying that you are connected. It will also tell you your new IP address.

NordVPN Windows app 10


Country selection

12. You can also connect by clicking the country pin on the map itself,

NordVPN Windows app 11a
As well as clicking the List button in the left side, and clicking the country in the list that appears.

NordVPN Windows app 11b


Connection wizard

13. If you stay in the Map view for a bit without connecting, the Connection wizard will appear.

NordVPN Windows app 12


14. The Connection wizard will give a recommendation for you, depending on your needs.

NordVPN Windows app 13


Search

15. You can also search for servers in the search menu found at the top right corner of the application. Simply search for a specific server or category.

NordVPN Windows app 14


Specific servers

16. In the Servers tab, you can find each specific server that we offer, neatly organized into categories and countries.

NordVPN Windows app 15


17. For example, we can expand the Double VPN category, and select the Netherlands – UK Double VPN server.
You can notice that each server has a percentage next to it, which indicates the current load of the server. The more people connecting to the server, the higher the percentage.
The distance to the server is also visible. That way you can quickly see if the server is further away from you.

NordVPN Windows app 16


18. To connect to the specific server, click the Connect now button in the sidebar.
Once connected, the sidebar will display the current amount of traffic transmitted.
You can also note that the top of the app also indicates that you are connected by sliding the Quick Connect button to the right side, and also displaying an appropriate status.

NordVPN Windows app 17


19. You can also add a server to your favourites by clicking the heart symbol next to it in the list, or, if the server is currently selected, in the sidebar.

NordVPN Windows app 18


20. Your favourite servers will appear in their own category, called My Favourite Servers. You can connect to them like any other server.

NordVPN Windows app 19


Settings

21. In the Settings tab you can configure the application to your liking.

    • Automatic Updates – enable this to automatically offer to update the application on startup. Enabled by default.
    • Auto connect – Enable this to automatically connect to a server when the application starts. Disabled by default.
    • Start NordVPN on startup – Enable this to start NordVPN when you start your computer. Enabled by default.
    • Kill Switch – Enable this to terminate any applications you specify in the case of an unintended disconnection. Disabled by default.

For example, you are using a public network, and use NordVPN to protect your confidential Skype conversation. You can add Skype to the Kill Switch list. In the case of an unexpected VPN connection cutoff, such as an unstable WiFi network, Windows will re-connect to WiFi, but the VPN connection will not be enabled yet. Kill Switch will close down Skype before it can transmit any of your sensitive info on the public network, thus ensuring your privacy.

    • Notifications – Enable this to receive Windows notifications when you connect or disconnect from a server. Enabled by default.
    • Show Tray icon – Enable this to display the NordVPN icon in the Windows system tray, which is where Windows displays applications that are running in the background. Enabled by default.
    • System of measurement – You can change the distance indicator between metric and imperial here. Imperial by default.
    • Advanced settings:
      • Server List – Enable this to show the “Servers” tab in the menu. Enabled by default.
      • Protocol – UDP is mainly used for online streaming and downloading. TCP is more reliable but a little slower than UDP and usually used for web browsing. UDP by default.

In the sidebar on the left you can also access your account details and the system log. The Logout button is also at the bottom.

Running in the background & closing the application

22. Once you close the application, it will still be running in the background. If Show Tray icon is enabled in the settings, you can see the application running in the system tray area, which can be found at the bottom right corner of your screen.

NordVPN Windows app 21a
It might also be in the hidden system tray area, which can be opened with the upwards arrow.

NordVPN Windows app 21b


23. You can click this system tray icon to bring the application to the foreground. You can also right-click the icon to either perform a Quick Connect, or terminate the application completely.

NordVPN Windows app 22

Add EasyPrivacy Filter to Adblocker

First, make sure you install Adblocker to your Chrome or Firefox

Click Here or copy and past this link in your browser: https://easylist.to/

Find the EasyPrivacy section towards the lower part of the page and click “add it to your ad blocker” as shown below.

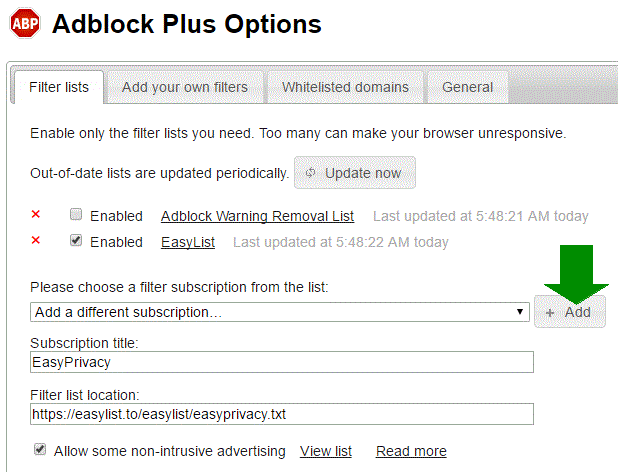
A tab will open with the Adblocker settings and will give you the option to add the new filter subscription.   Click the Add button as shown below.

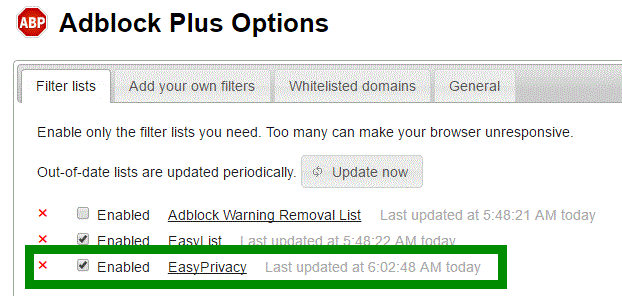
Once installed, you will see EasyPrivacy is Enabled and the filter is active.

April Fool!!

Ok, I couldn’t resist.  My apologies.

How about a free ebook with some jokes in it to make up for my funny bone:

Clean_Jokes_from_the_Internet_5.5×8.5_PDF

Hope you will forgive me!

Turn Off Windows Defender

Disable Window Defender only if your are replacing it with a different antivirus.

We highly recommend that you use an antivirus with your system.

Windows 10

Using Local Group Policy Editor to disable Windows Defender from your computer permanently.

  1. Use the Windows key + R keyboard shortcut to open the Run command.
  2. Type gpedit.msc and click OK to open the Local Group Policy Editor.
  3. Browse the following path:

    Computer Configuration > Administrative Templates > Windows Components > Windows Defender

  4. On the right, double-click Turn off Windows Defender.
  5. Select Enabled to disable Windows Defender.
  6. Click Apply.
  7. Click OK.
  8. Restart your computer.

How to Disable Windows Defender in Windows 7 or 8

  1. Open up Windows Defender, go to Tools on the top menu, and then click on Options.
  2. Click on Administrator on the left-hand pane, uncheck the box for “Use this program”, and click the Save button.
  3. You will then get a confirmation that the program is turned off.
  4. Also open up the Services panel through Control Panel, or by typing services.msc into the Start Menu search or run boxes. Find Windows Defender in the list and double-click on it…
  5. Then you can change Startup type to Disabled.
SELabs Virus Protection Data
Loader Loading...
EAD Logo Taking too long?

Reload Reload document
| Open Open in new tab